How to Start a Container Garden on a Patio or Balcony
No yard? No problem. Learn how to grow tomatoes, peppers, and more in 5-gallon buckets with the right soil, watering, and fertilizing strategy.
How to Start a Container Garden on a Patio or Balcony
You don't need a yard, a raised bed, or a significant budget to grow real food. A few 5-gallon buckets, the right soil mix, and a sunny patio or balcony is genuinely enough to grow tomatoes, peppers, beans, and more. Container gardening isn't a compromise for people without space — it's a tool experienced gardeners use deliberately. This guide covers exactly what to use, how to fill it, how to plant, and how to keep your plants fed and watered from transplant day through the end of the season.
Quick Answer
To start a container garden, use food-safe containers with drainage holes drilled in the bottom — a 5-gallon bucket is the most reliable starting point. Fill them with a purpose-built potting mix (not garden soil), and work organic granular fertilizer into the top few inches at planting time. Water based on container weight rather than a fixed schedule, and top-dress with compost and fertilizer every 30–60 days once plants begin flowering.
Choosing the Right Container
The requirements are simple: the container must hold enough soil volume, drain freely from the bottom, and be made from food-safe materials if you're growing food.
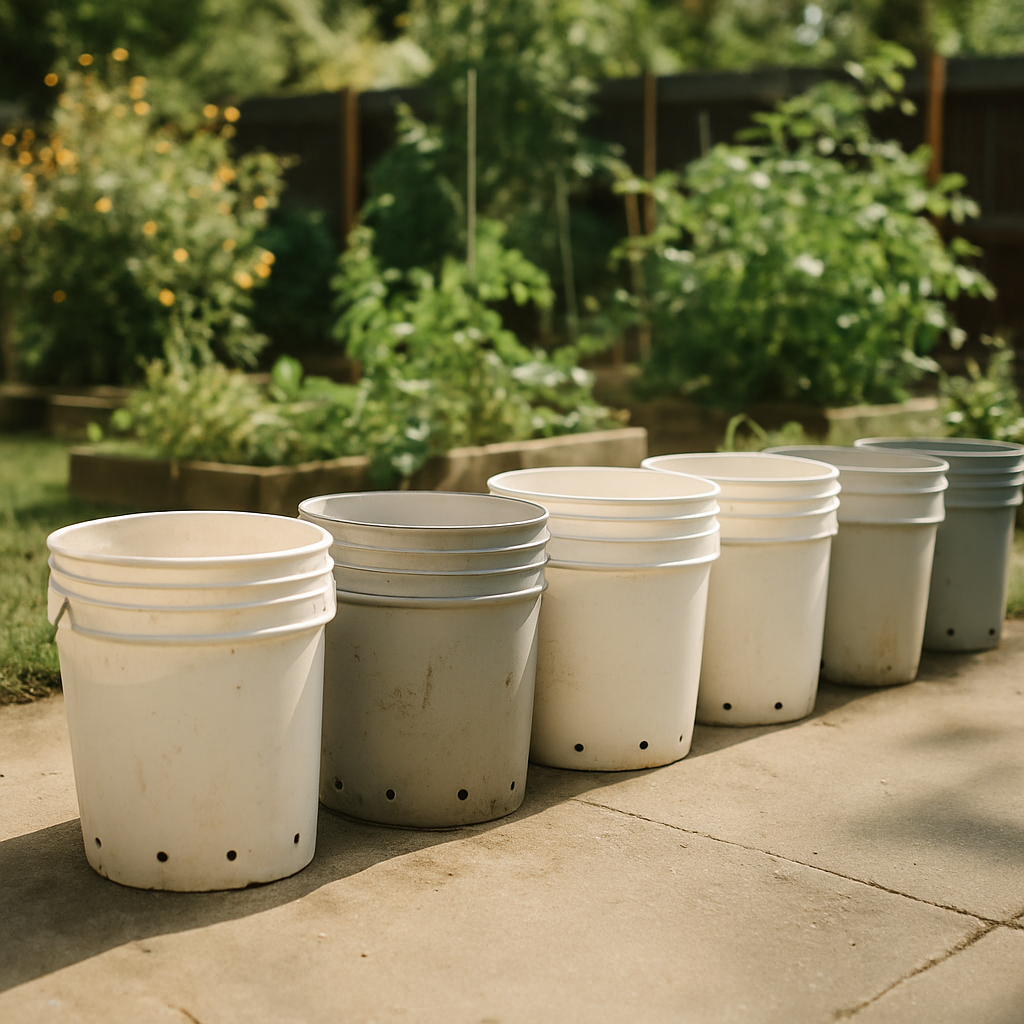
5-gallon buckets are the practical starting point. They're inexpensive, widely available, and large enough for one tomato, pepper, or eggplant plant. If they don't have drainage holes, a half-inch drill bit handles that in under a minute — drill the holes in the bottom, not the sides, to avoid creating zones where water pools.
Larger recycled food-grade totes give you more root volume and function more like a small raised bed. They're worth adding once you're comfortable with the basics and want to grow multiple plants or try companion planting in a single container.
Cardboard boxes are a low-commitment option for short-season crops like lettuce or for growing potatoes. They'll decompose by end of season, which simplifies cleanup but means they won't carry over to next year.
Check the Resin Code
If you're repurposing any plastic container, flip it over and look for the resin identification code stamped into the bottom.
- Codes 2, 4, and 5 are food-safe for repeated use
- Code 1 (like single-use water bottles) is intended for one-time use and is best avoided for growing food
Container Color and Heat
Container color affects root zone temperature more than most gardeners expect. White or light-colored containers reflect heat and keep roots cooler. Dark containers — including many popular black grow bags — absorb heat and can stress roots on hot summer days. For tomatoes and peppers in full sun, lighter-colored containers are the better default.
Why Drainage Is Non-Negotiable
Roots need oxygen just as much as they need water. When water has nowhere to go, soil turns anaerobic and roots rot — often quickly, and often without obvious symptoms above ground until the plant is already in serious trouble.
Every container needs drainage holes at the bottom. If you're using store-bought pots or planters, check that those holes are actually clear before filling with soil.
Place a tray or saucer beneath each container. The runoff that collects there gets slowly reabsorbed by the soil from below, which conserves water and keeps fertilizer in the root zone instead of washing it out onto your patio.
Building a High-Performance Container Soil Mix
This is where container gardening most often goes wrong. Native garden soil, in-ground soil, and raised bed blends are too dense for containers. They compact, drain poorly, and cut off the airflow roots need. Always use a purpose-built potting mix or mix your own.
The 3-2-1 Mix
A reliable DIY container soil follows this ratio by volume:
- 3 parts coco coir (or peat moss as a lower-cost alternative)
- 2 parts compost (mushroom compost or well-aged cow manure compost both work well)
- 1 part perlite and vermiculite combined, split roughly evenly between the two
Coco coir is preferred over peat moss because it rehydrates more easily after drying out and is a more sustainable material. Peat moss is more widely available and slightly cheaper, but it's more acidic and harder to rewet once it dries completely.
Splitting that final part between perlite and vermiculite gives you both drainage and moisture retention — a better balance than either ingredient alone. Pre-moisten the mix before transplanting. Dry potting mix often has dry pockets that resist wetting from the top. Mixing in water first gives transplant roots consistent contact with moist soil from day one.
Store-Bought Potting Mix
If you'd rather not mix your own, look specifically for products labeled "potting mix" — not raised bed soil and not garden soil. Quality potting mixes are formulated for container drainage and aeration. Plan to add fertilizer separately, since the initial fertility in bagged mixes varies and won't last the full season.
Fertilizing: At Planting and Through the Season
The 3-2-1 mix provides good structure and some biological life from the compost, but it's intentionally low in fertility at the start. You can always add nutrients, but you can't fix dense soil once plants are in the ground.
At Transplant Time
Work roughly one-third of a cup of organic all-purpose granular fertilizer into the top few inches of soil before setting your transplant in. It doesn't need to be mixed deep — watering will carry nutrients down over time.
Organic fertilizers are strongly preferred over synthetic here. They release slowly, are far less likely to burn plants, and support the soil biology that makes container growing productive over a full season.
Through the Season
Once plants are actively growing stems and leaves, liquid fish fertilizer works well to support that vegetative phase. Pull back on it once flowers appear — high nitrogen at flowering tends to push leafy growth at the expense of fruit.
Once plants begin flowering and setting fruit, shift to top-dressing every 30–60 days: add a thin layer of compost mixed with a bit of granular fertilizer to the surface of the soil. This step is especially important for indeterminate tomatoes and long-season crops like peppers, which can produce all the way into fall if kept fed.
Transplanting Step by Step
- Position the container first, then fill it. A soil-filled 5-gallon bucket full of water is heavy — move it before filling, not after.
- Leave 2–3 inches of headroom at the top. You'll need that space for top-dressing and mulch additions later in the season.
- Add mycorrhizal inoculant to the planting hole before setting the transplant in. This supports root development and soil biology from the start. (Skip this for brassicas like cabbage or broccoli — mycorrhizae don't benefit those crops.)
- Plant tomatoes deeper than their original soil line. Remove any leaves that would be buried. Tomatoes form roots along buried stem sections, giving the plant a larger and more resilient root system.
- Water in slowly and thoroughly until runoff appears in the tray beneath. Expect the soil to settle slightly — that headroom you left will absorb the change.
Watering Container Plants Correctly
Inconsistent watering is one of the most common reasons container gardens underperform. Both overwatering and underwatering cause real damage, and early symptoms can look similar.
Use container weight as your guide. Lift the pot right after watering and note how heavy it is. Check again after a day or two. When it feels significantly lighter, it's time to water. This approach adjusts automatically for plant size, weather, and season — a fixed daily schedule doesn't.
Soil should cycle between moist and slightly dry, not stay perpetually wet. That partial drying is what keeps oxygen moving through the root zone.
In peak summer with large, established fruiting plants, daily watering — or even twice daily — can become necessary. Letting containers go completely dry and then flooding them contributes to problems like blossom end rot in tomatoes, which develops when inconsistent moisture prevents calcium from reaching developing fruit.
Mulching Your Containers
A thin layer of mulch on the soil surface slows evaporation and keeps roots cooler during hot weather.
- Wood chips work well for tomatoes and other fruiting crops
- Shredded leaves are a good option — chop them first to prevent matting into a layer that sheds water rather than absorbing it
- Straw is effective and lightweight — use seed-free straw, not hay
When you top-dress with fertilizer, pull the mulch back briefly so the new material can contact the soil directly, then replace it after watering in.
Container Gardening Advantages Worth Knowing
Containers are often treated as a fallback. They're actually a strategic tool that experienced gardeners use deliberately.
- Disease isolation. Starting with fresh potting mix removes the risk of soil-borne diseases like Fusarium wilt that can devastate tomatoes in beds with a disease history.
- Seasonal flexibility. Peppers and eggplant are slow to mature and often still producing when fall garden transitions need to happen. Keeping them in buckets means they never tie up raised bed space.
- Overwintering peppers. Peppers are perennials. Bringing container-grown pepper plants indoors before first frost lets you overwinter them and start the next season with an established plant — a significant head start over growing from seed or transplant.
- Mobility. Move plants inside before a late frost, shift them to shade on extreme heat days, or reposition as sun angles change through the season.
- Vertical growing. Trellises, fences, or nearby structures above containers can dramatically increase yield from a small patio footprint. Position taller, vining crops to the north (in the Northern Hemisphere) so they don't shade shorter plants.
Common Mistakes
Using Garden Soil in Containers
Garden soil, native soil, and raised bed blends compact quickly in containers, restrict drainage, and suffocate roots. Always use a potting mix formulated for containers or the 3-2-1 DIY mix. This is one mistake that genuinely can't be fixed after planting.
Skipping Drainage or Skipping the Tray
Every container needs holes in the bottom. A tray underneath is also important — not optional — because it prevents water and nutrients from running off the patio and gives the soil a way to reabsorb moisture from below.
Watering on a Fixed Schedule
Watering every day regardless of plant size, weather, or actual soil moisture is one of the fastest ways to overwater a container. Let the weight of the pot tell you when the plant is thirsty.
Stopping Fertilization After the First Few Weeks
Container soil has a finite nutrient supply, and roots can't chase nutrients the way in-ground plants can. Plan for top-dressing every 30–60 days from the time plants begin flowering. Don't treat fertilization as a one-time step at planting.
Choosing Dark Containers Without Considering Heat
Black pots and dark grow bags absorb significant heat. In hot climates or full-sun locations, they can stress roots during peak summer. White or light-colored containers are a better default for tomatoes and peppers.
FAQs
Can I use regular potting soil from the garden center instead of making my own mix?
Yes — look specifically for products labeled "potting mix," not raised bed soil or garden soil. These are formulated for container drainage and aeration. They're a solid starting point, but plan to add fertilizer as the season progresses, since initial fertility in bagged mixes varies.
How many plants can I fit in one 5-gallon bucket?
For large fruiting crops — tomatoes, peppers, eggplant — plan on one plant per 5-gallon bucket. Smaller crops like bush beans or lettuce can be planted more densely, and larger totes give you more flexibility if you want multiple plants in a single container.
Do I need to replace my container soil every year?
Container soil degrades in structure and depletes in nutrients over time. At minimum, refresh it with compost and fertilizer between seasons. If you've grown a disease-prone crop like tomatoes, starting with fresh mix the following year meaningfully reduces the risk of soil-borne problems.
Why are my container tomatoes wilting even though I just watered them?
In hot weather, large plants can lose water faster than soil can supply it. Brief midday wilting that recovers by evening is usually heat stress, not drought. If wilting persists into the evening, the plant genuinely needs water. Check soil moisture a few inches down, not just at the surface.
What's the advantage of containers over just building a raised bed?
Containers offer mobility, disease isolation with fresh soil, easier overwintering of perennial crops like peppers, and the ability to garden with zero ground space. Raised beds offer more root volume and less frequent watering. Many experienced gardeners use both — raised beds for annuals, containers for peppers, eggplant, and tomatoes.
Your Container Garden Action Plan
Here's what to do this week and through the season:
- Gather containers. Source 5-gallon food-safe buckets (check the bottom for resin codes 2, 4, or 5). Drill half-inch drainage holes in the bottom of each one and place a tray or saucer beneath it.
- Prepare your soil. Mix or purchase a quality potting mix. If mixing your own, combine coco coir, compost, perlite, and vermiculite in the 3-2-1 ratio and pre-moisten before use.
- Set up for transplanting. Position containers where they'll live before filling them. Work one-third of a cup of organic granular fertilizer into the top few inches, add mycorrhizal inoculant to the planting hole, and set tomatoes deeper than their original soil line. Water in slowly until the tray catches runoff.
- Calibrate your watering. For the first two weeks, check container weight daily. Resist watering on a fixed schedule — let the plant's actual water use guide you.
- Plan for the long haul. Once plants begin flowering, top-dress every 30–60 days. Add mulch to retain moisture. Before first fall frost, consider moving pepper and eggplant containers indoors to overwinter for next season's head start.
Related blogs
Holes in your leaves? Here's the organic pest control system that matches the right tool to the right pest — before more damage is done.
August isn't too late — it's prime time for fall planting. Learn which crops to plant now, how to time them, and the tricks that actually work.
Mid-summer garden slump is normal — here's how to inventory what's still working and take action now for a strong fall harvest.
Still waiting on green tomatoes? These 5 practical methods shift your plant's energy toward ripening fruit faster — starting this week.
Skip the hilling, still get a real harvest. Here's how deep planting and one mid-season step make raised bed potatoes genuinely low-effort.
Too many tomatoes? Here are 6 practical ways to freeze, can, dry, and sauce your garden harvest so nothing goes to waste.
Break your raised bed into a simple grid and grow 2–3x more food from the same space. Here's exactly how to set it up.
No yard? No problem. Learn how to grow tomatoes, peppers, and more in 5-gallon buckets with the right soil, watering, and fertilizing strategy.
Wood chips can build incredible soil — or wreck a bed. One mistake makes all the difference. Here's what actually works.
Seeds from a fast food tomato can grow into a real plant — here's how to extract, germinate, and grow them successfully.